October 22, 2009

Baby's Soft Book of Colors

IMG_1415


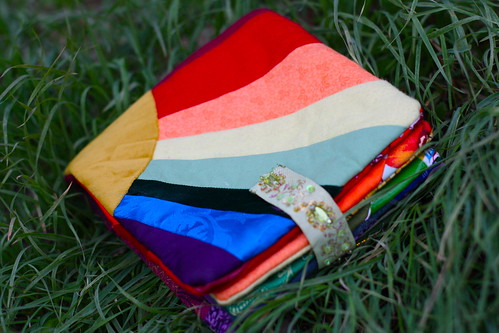
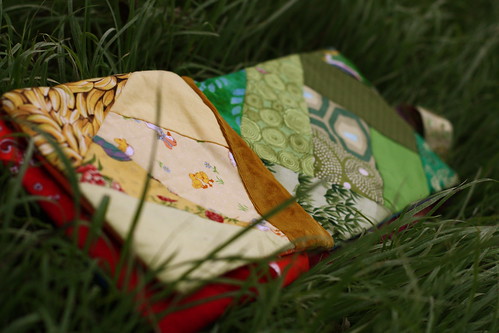
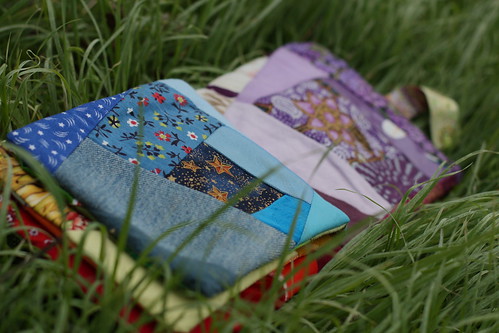
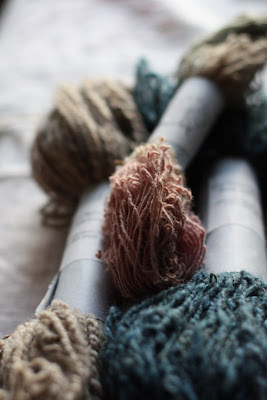
This tutorial uses crazy quilt squares to make a soft book for baby. Each "page" is a crazy quilt square with scraps of just one color so baby can see lots of shades and variations of each color; together the pages make up a rainbow soft book. Use scraps with lots of texture and pattern to keep baby interested. Finn and I had a lot of fun choosing the fabric scraps and everyone in my family has enjoyed seeing little bits of memories from their lives sew together: a piece of Granny's shirt, a scrap from a cousin's baby blanket, a bit of fabric leftover from an auntie's first quilt. The whole family has loved "reading" Finn's book of colors!


Finn with his Papa.


Finn with his cousin Ella.


Finn with his auntie Leandra (my little sister) and uncle Obie.

If you've never pieced a crazy quilt (or any quilt) before, don't worry! I hadn't either and it turned out to be really easy and fun. And I've put together a little video to help you.

Supplies:
fabric scraps
1 4" piece of ribbon
fabric for backing: 4 pieces measuring 8"x8", 4 pieces measuring 7 1/2"x7 1/2"
batting: 1 piece measuring 8"x15", 1 piece measuring 7 1/2"x14"
small piece of iron-on velcro
and of course thread, sewing machine, and an iron.

All seam allowances are 1/2".

1. Separate scraps into piles based on color: red, orange, yellow, green, blue, and purple. You should have at least 5 scraps of each color.


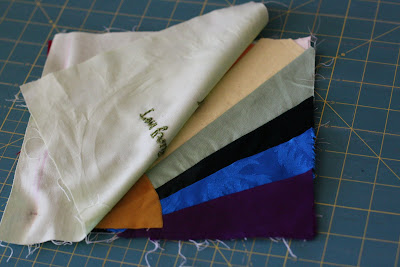
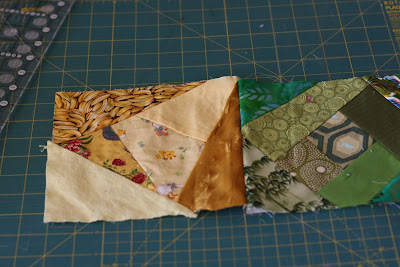
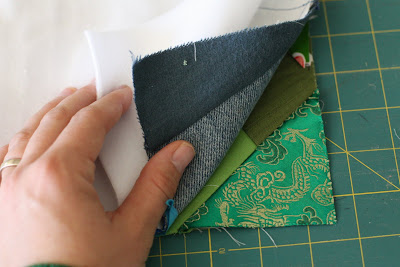
2. Piece a crazy quilt square for each color. Use the larger backing squares for red and purple. Use the smaller backing for orange, yellow, green and blue. Here's a video tutorial for piecing crazy quilt squares... it's easy and very free form!


3. Make a front and a back cover using the remaining 8"x8" backing squares. I made a rainbow for the front and embroidered a message on the back. Other ideas are an appliqued title or even just a solid piece of a favorite fabric.


4. Start putting the book together:
Put the back cover face up, top with the front cover face down. Sew along the right side.


Red square face up, top with purple face down. Sew along the right side.
Blue square face up, top with orange face down. Sew along the right side.
Yellow square face up, top with green face down. Sew along the right side.
Press all seams.


5. Attach your velcro: one side to the ribbon, one side to the front cover 1 1/2" from the right side and centered top to bottom.

6. Now for the batting:
Put the back and front covers face up, lay purple and red face down with purple on top of the back cover and red on top of the front cover. Lay the larger piece of batting on top. Sew all three layers together along top, right side, and bottom.

Place blue and orange face up, lay green and yellow face down with green on top of blue and yellow on top of orange, lay one layer of fleece or batting on top. Sew all three layers together along top, right side, and bottom.


Clip corners (but don't clip the seam!), turn both pieces right side out and press.


7. Hand stitch the final seam closed on each piece.

Be sure to stitch the ribbon into the seam between the back cover and the purple square.


8. Hand sew the book together with a line of stitches along the binding of the book. Make sure the colors are in rainbow order. It's ready for baby!
IMG_1400
IMG_1401
IMG_1403
IMG_1415

And I managed to finish this tutorial just in time to enter it into the Sew, Mama, Sew! Scrap Buster contest! Have you been checking out all the scrappy goodness? Lots of Christmas ideas!


Updated to add: If you make a soft book, please consider adding photos of it to Homegrown Happy's Flickr Group.

October 19, 2009

Ag Day

Yesterday was Ag Day at Finn's future school, which is also my elementary alma mater (go Falcons!)

There were some interesting household appliances on display.


The local bakers, wool spinners, beekeepers, and farmers sold their wares.


This little biker showed off his dimples and his croissant.


There were sheep dog trials -- I tried to get Humphrey to take notes on the perfect behavior of those working dogs but he just wanted to chase the sheep; needless to say, he had to stay on-leash.


And some of the parents put together a delicious taco lunch to benefit the new school garden.


The garden is growing well, the worms are composting, and the scare crow is... scaring crows.


And I came home with a full belly, a few tasty treats, some seeds for the winter garden, and of course some crafty goodness.


How did you play this weekend?

October 17, 2009

No Peeking!

Two wonderful things happened yesterday: the rain arrived and Finn finally started napping. It was the perfect opportunity to get started on my crafting for Christmas gifting.


I'll mostly be knitting and crocheting this year so I can take advantage of those sleepy nursing sessions to multitask. I've got a lot of recipients on my list, so I've got to start early and focus on small projects, mostly hats and mittens and the like. Here are some links to things I'm considering making (note to family: now's the time to stop reading...)

[DSC_1786.JPG]
Toasty from a friend to knit with
Garter stitch + knit in the round = perfect movie watching knitting


Mosey from Knitty
I want these for myself!


Fuzzy Lamb from Lulu

[Wallet+Tutorial+10.4.2009+051.jpg]
Zippy Wallet by Noodlehead


Give a Hoot from Kelbourne Woolens


Turn a Square by Jared from brooklyntweed


Dinosaur Play Mat from Craftzine
It folds up into a volcano shape for storing.


Star Crossed Slouchy Beret by Strands of Me


Danica from Knitty
I've never tried entrelac and I'm embarrassingly excited about this one.


Mushroom Business Card Holder from Wee Folk Art


Calorimetry from Knitty (once again!)


Fetching from (you guessed it) Knitty


Fabric Dollhouse from UK Lass in US
This reminds me of a wooden version my little sister had.


Chunky Button-Up Neckwarmer by Susan Flockhart Designs


Plum Blossom Mittens from Valley Yarns
Not free, but it's only $1.99 for the pattern


Dainty Earrings by Julie A. Buldoc
Hello stocking stuffers!


Trypdisc Earrings by Tossed Cookies


Jofus and Lally by Vintage Ric-Rac

Plus I've got a few ideas of my own (stay tuned!)  Whew, this is starting to seem a bit overly ambitious...  I better go get crafting!

What are you working on?

October 12, 2009

Triple Ginger Cookies

Hello there!  Are you visiting from the Craftzine.com blog?  Thanks for coming over, have a look around, make yourself comfortable, stay awhile!  I baked you cookies!


Since everyone has been so nice to me since I admitted to my obsession with Laura Ingalls Wilder, I've got another confession to make: as much as I like to bake, cook, craft, and generally make things from scratch, there are a few products that I just love too much to stop buying.  Yes, Trader Joe, I'm talking about you and your Triple Ginger Cookies.  Unfortunately, an infant, an hour-long drive to the nearest TJ's, and a heavy downpour have conspired to keep me cookie-less. 


So I broke out my ginger -- fresh, dried, and candied -- and set to work. The result is (dare I say it?) even better than TJ's: they're big, soft and chewy with a cracked and sugar-crusted surface.  Baking them made my house smell so heavenly I could almost imagine it was made of gingerbread.  And they're the perfect complement to a rainy day at home with my sweet ones.


Triple Ginger Cookies

Inspired by the Triple Ginger Cookies from Trader Joe's.
Makes 16 large cookies


3/4 cup unsalted butter
1/3 cup white sugar
1/3 cup brown sugar
1 large egg
1/2 Tablespoon grated ginger
1/4 cup unsulphured blackstrap molasses
2 1/4 cups flour
1 teaspoon baking soda
1 1/2 teaspoons ground ginger
3/4 teaspoon cinnamon
1/2 teaspoon cloves
1/2 teaspoon nutmeg
1/4 teaspoon salt
1 Tablespoon candied ginger, minced
raw sugar

1. Preheat oven to 350 degrees. Line a baking sheet with parchment paper (or butter a baking sheet.)
2. Cream butter and white and brown sugars. Add egg, grated ginger, and molasses and combine well.
3. Add in flour, baking soda, spices, and salt.
4. Add candied ginger and stir to combine.
5. Drop large spoonfuls onto baking sheet. Sprinkle with raw sugar and bake for 12 to 15 minutes or until golden brown and slightly cracked.