September 26, 2009

A is for Acorns and Autumn

This past winter, way back when I was still pregnant and had no idea what sleep deprivation was like, I knitted baby clothes to relax. Not having any babies around to measure or fit, I guessed on size a little bit. So I now have a collection of adorable baby knits in preemie sizes. The hats in particular are tiny (wishful thinking?) and useless for a baby born in July. I recently pulled out one I knitted way back in January with the idea of dressing up my babe as an acorn this Halloween. Unfortunately, it's a bit too small for my (admittedly huge) son.


And it doesn't suit Humphrey. Besides, whoever heard of a furry acorn...


Maybe I'll rework the pattern for pleasantly plump babies. In the meantime, I'll stick to simpler crafty projects, activities that an be completed during the 15 minutes Finn sleeps. Here's a quick project to bring autumn indoors:

I started by separating the acorns from their caps and then drilling two holes in each cap.


Next I threaded a piece of cotton yarn through the holes.


And glued the cap back onto the acorn.


I'll use them as hangers on presents. A gift tag of an oak leaf cut out of paper or felted wool from an old sweater is a sweet addition.


Or they could be tied to a piece of ribbon as a napkin ring.


For more acorn goodness, here's a collection of craft ideas. I hope you get some inspiration and find your autumn spirit too!


Printable Acorn Garland by Amy Atlas

[IMG_2341.JPG]
Acorn Wreath at Scribbit

[acornleaf.jpg]
Felt Acorns by Betz White


Velvet Acorns by Heather Donohue


Acorn Napkin Rings at Martha Stewart

And there's this post at www.ehow.com about drying acorns properly to get rid of any insects that may have made your acorns their home.

September 24, 2009

Buttermilk Sherbet

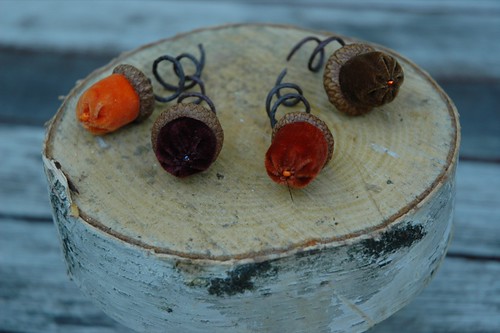
Rumor has it that it's fall. The maple trees are turning yellow and the poison oak is bright red, acorns are dropping on our roof with loud bangs, and the light is a beautiful golden color. So why is it in the nineties today? Why am I sweating? Why do I feel like taking off all my clothes? (Don't answer that last question...)

It must be fall in northern California, otherwise known as Indian Summer. And the best way to beat the heat -- besides stripping naked and going for a swim -- is a cold frozen treat, preferably something fruity and not too heavy with a nice balance of sweet and tart. This is where sherbet comes in, in all its creamy fruitiness. Now, I had a long-standing aversion to sherbet based on childhood memories of the Baskin Robbins version: fake fruit flavors and a disappointing lack of richness as compared to ice cream. But it turns out that homemade sherbets are a whole different animal, combining the best of sorbet and ice cream.


I've been playing with ice cream recipes, replacing milk and cream with lighter buttermilk, and I'm loving the way it plays off of fruit and the tangy flavor. So break out your ice cream maker (what? You don't have one? Buy one now, it's the best $40 you'll spend this week and an easy way to make show-stopping desserts. Be forewarned, it will ruin you for store-bought "fro-yo" -- but I promise you won't miss it.)

So whip up some tasty low fat ice cream and stay cool while autumn rages on. And while you're at it, try these free printable ice cream gift tags, courtesy of Eat Drink Chic. Enjoy!


Lemon Buttermilk Sherbet

adapted from David Lebovitz's "The Perfect Scoop." And have you checked out his blog? It's an ice cream fanatic's dream come true.
makes about 1 quart


1/3 cup water
2/3 cup sugar
zest of 1 lemon
2 cups buttermilk
1/4 cup lemon juice (from about 2 lemons)

1) Combine the water, sugar and lemon zest in a small saucepan. Heat, stirring frequently, until the sugar is dissolved. Remove from heat and let stand until the syrup reaches room temperature, then chill thoroughly in the refrigerator.
2) Whisk the buttermilk into the syrup, then whisk in the lemon juice.
3) Freeze in your ice cream maker according to the manufacturer's instructions (or place in a container in your freezer and stir with a fork, breaking up clumps, every 15 minutes.)

---------------------------------------------------------------------------------------

Nectarine and Ginger Buttermilk Sherbet
adapted from Martha Stewart
makes about 1 quart

3/4 pound ripe nectarines (I used very sweet white nectarines)
1/2 cup sugar
2 Tablespoons agave syrup (you can omit and replace with honey or sugar if you don't have this on hand)
1 Tablespoon freshly squeezed lemon juice
1/2 teaspoon grated fresh ginger
1 1/4 cups buttermilk

1) Quarter nectarines; remove and discard pits, but do not peel. Place in a food processor and puree until smooth, about 1 minute.
2) Add sugar, agave syrup, lemon juice, and ginger. Pulse to combine.
3) Transfer to a medium bowl, add buttermilk and chill the mixture.
4) Freeze in your ice cream maker according to the manufacturer's instructions (or place in a container in your freezer and stir with a fork, breaking up clumps, every 15 minutes.)

September 19, 2009

Happy Hour

Being a new mama, I'm struggling with trying to find balance in my life. There is plenty of time spent with baby, some time for Papa, and a bit of time spent housekeeping, leaving very little Me-Time. I'm finding that building just a few moments into my day for myself is essential to maintaining my sanity and sense of myself as a functioning, independent person. And I really only need a few moments for a shower or reading a few pages, maybe I'll even do some yoga one of these days. The crucial thing is to ritualize these moments a little so they feel significant -- this serves to distract from their unfortunate brevity.

To build a ritual, it helps to have a few accessories; today mine are a chair with a view, my current knitting project and a delicious and pretty drink.


Some dappled sunlight and listening to This American Life on my ipod help too.

That gorgeous rosy drink, it's made from hibiscus flowers. And who wouldn't want to sip a frosty, ruby-colored, fruity-flavored tea made from flower petals? I'm enjoying mine with nothing but ice and a squeeze of lime, but it would be even tastier and more relaxing (for the non-breastfeeding set) with a pour of alcohol. So for happy hour five minutes this weekend, I'll be sipping a Hibiscus Cooler. Cheers!


Hibiscus Cooler
Hibiscus flowers can be purchased at most Latin American markets. Ask for Jamaica (pronounced huh-MIKE-uh.) You may also find it at health food stores or locally at Andy's Produce in the bulk herb section.

2 cups hibiscus flowers
3/4 cup sugar (or to taste)
Optional flavorings: 6 slices of ginger root, 2 cinnamon sticks, juice of 1 orange (choose one)
1 1/2 quarts boiling water

1) Put hibiscus flowers, sugar, and optional flavorings into a large heatproof pitcher or container.
2) Pour boiling water into container and steep for 20 minutes. Strain. Taste and adjust sweetness if necessary.
3) Serve over ice with a sparkling water floater and a wedge of lime or use in the cocktails below.


Jamaican Ruby

1 ounce rum
6 ounces Hibiscus Cooler
Ice

Pour rum over ice in lowball glass. Add Hibiscus Cooler and garnish with a lime wedge.

---------------------------------------------------------------------------------------

Hibiscus Margarita
adapted from this recipe.

2 ounces tequila
4 ounces Hibiscus Cooler
juice from half a lime
1 ounce simple syrup
Ice

Mix all ingredients in a glass, or alternatively, blend in a blender. Garnish with a lime wedge.

---------------------------------------------------------------------------------------

Hibiscus Cosmo
adapted from this recipe.

2 ounces vodka
1/2 ounce Grand Marnier
1 ounce Fresh squeezed lime juice
1 ounce Hibiscus Cooler
3/4 ounce simple syrup

Pour all ingredients into a chilled cocktail shaker filled with ice. Shake well and strain into a chilled martini glass. Garnish with a lime twist.

September 18, 2009

Basil Pesto

As summer fades into fall, I'm thinking a lot about savoring these last few days of warm weather. The weekend promises to be hot here; it's already in the high eighties. So in the cool of morning, before it gets hot enough that all we can do is swim and sip icy drinks, I made pesto -- a big batch so that when winter comes and those long, cold days set in, I'll be able to pull a few jars out of the freezer and be reminded of the heat and the peppery basil scent of summer.


Basil Pesto
I don't follow a recipe when I make this but today I tried to pay attention so that I could pass some concrete measurements along. So use this as a guideline and adjust to your taste, adding or subtracting garlic and salt or making substitutions for the nuts and basil. Makes about 3 cups.

3/4 cup toasted pine nuts*
6 cloves garlic
1 teaspoon salt
12 cups basil leaves**
1/2 cup olive oil

1) Grind pine nuts, garlic and salt together in a food processor or blender until relatively smooth -- you should have a paste with a consistency a bit like peanut butter.
2) Add basil a handful or two at a time, pulse to chop finely after each addition.
3) With the motor running, gradually pour in olive oil and blend until the pesto is creamy. Taste and adjust seasoning if necessary.

You can freeze your pesto in small canning jars, ziploc bags or other containers. I like to freeze some in ice cube trays for those times when you just want to add a tablespoon or two to flavor a soup or other dish. If you plan to use the pesto fresh, float a tablespoon or two of olive oil over the top of your pesto to keep it from discoloring and store in the fridge.

*Pine nuts are traditional but you can substitute all or a portion for cashews, walnuts, or pepitas.
**Try making pesto with other greens or herbs: arugula, spinach, chard, cilantro, parsley or carrot, radish or beet greens. Bear in mind that beet greens will turn your pasta a bit pink, however; kids may like this or they may think it's disgusting -- you've been warned.


September 17, 2009

Watch out world

Because our little genius has learned how to grab ahold of things...


and bring them...


to his mouth!


Humphrey better hold on to his tail.

September 15, 2009

Homemade Granola

Before my husband and I were married, breakfast was a bit of a sticking point.  While I liked a big, hearty American-style breakfast, my European sweetheart ate nothing but cornflakes and milk.  This didn't seem to bother him one whit, but was a problem for me; who wants to poach just one egg or whisk a tiny dollop of hollandaise sauce?  While bringing Arnoud breakfast in bed was as easy as pouring milk over flakes, I never received the same special treatment in return, and really, who could blame him?  It would have involved hours of chopping potatoes and flipping omelets.

This rift was healed, symbolically and actually, on our first morning as husband and wife.  We woke in our charming room tucked under the eaves of the J.D. house, a bed and breakfast in Mendocino, to the smell of cinnamon and toasted almonds.  Following our noses downstairs, we were served bowls of homemade granola with yogurt and fresh fruit.  Finally, the perfect breakfast to satisfy us both: hearty and full of enough protein to keep me content for hours and crunchy sweet grains to please my sweetheart.  And we lived happily ever after.


Homemade Granola, the simple recipe for a lifetime of wedded bliss
Although there seem to be a lot of ingredients, you probably already have all of this in your pantry.  But don't worry if you're missing something as substitutions, additions and creativity are very welcome.  It all comes together very quickly and it makes a big batch, so your little bit of effort will be rewarded every morning for quite awhile.

7 cups rolled oats
3 cups nuts and/or seeds (any variety.  I've used almonds, walnuts, cashews, hazelnuts, pecans, pumpkin seeds, sunflower seeds, and flax seeds.  Mix and match, be creative, go wild.)
1 cup unsweetened coconut flakes
1/2 cup powdered milk or soymilk (optional, adds a bit of protein and creaminess)
1/4 cup brown sugar
2 teaspoons cinnamon
1 teaspoon salt
1/2 cup oil (vegetable or a mild flavored olive oil)
1/2 cup maple syrup (or substitute honey)
1 teaspoon vanilla extract
3 cups dried fruit (raisins, cranberries, cherries, banana chips or chopped dates, apples, apricots, etc)

1)  Preheat oven to 300 degrees Fahrenheit.
2)  Mix the dry ingredients (oats through salt) together in a large bowl.
3)  Add the wet ingredients (oil through vanilla) and stir well to coat.  If you've used honey, you should warm it with the oil and vanilla so it will spread evenly.
4)  Spread the granola on two ungreased baking sheets and toast in the preheated oven, stirring every 10 minutes, until warm and just starting to turn golden brown, about 30 minutes total.
5)  Return the granola to the mixing bowl and stir in the dried fruit.  Cool completely before storing in an airtight container.

September 13, 2009

Hemming Jeans in 15 Minutes

I have short legs. Very short legs. And is it just me, or are jean legs getting longer? All those beautiful expensive jeans seem to come only in 36 inch inseams. I think they're trying to give me a complex. Of course, I could spend $25 to get my jeans hemmed professionally, but since I'm cheap thrifty, I figured I could find a way to do it myself. And let me tell you, this has been life changing. All it takes is 15 minutes, a measuring device, and a bit of sewing (I used a machine, but you might even be able to sew your jeans by hand) and the results are nothing short of magical. And with all the money I'm saving, I might just be able to buy myself that pair of premium jeans.

1) First, try on your jeans and the shoes you'll usually wear with them and cuff the jeans to exactly the length you'd like. Pin this cuff in place before removing the jeans. This step is a bit easier if you have a partner to help you pin.


2) Next, measure the length of the cuff including the original hem. We'll call this measurement A.


Unpin the cuff and re-pin it to measure 1/2 of measurement A excluding the original hem.


For example: if measurement A is 2 inches including the hem, your pinned cuff should measure 1 inch excluding the hem.

3) Using a thread color to match your jeans, sew this cuff in place. Use a straight stitch and stitch as close as you possibly can to the original hem.


4) Finish by pressing the cuff up out of the way inside your jeans and then tack the cuff in place by making a few stitches at both of the side seams. This will keep the cuff from drooping down and ruining the magic.


That's it! Now throw on those fancy jeans and walk tall. Add a pair of heels and no one has to know you've got a 30 inch inseam.


I'll stick with my dirty flip-flops though. Just keepin it real.

September 8, 2009

Slow-Roasted Tomatoes


Today is the first day that I can really feel autumn in the air. There are great big clouds racing across the sky, chased by strong wind. And the leaves are falling off the trees, swirling and dancing their way to the ground. It's the kind of day that makes me start thinking about putting things up for winter, about laying away provisions for the time when (it's hard to imagine!) there won't be tomatoes dripping off the vines and such an over-abundance of cucumbers that I almost can't imagine eating another. It's also a day for being cozy and lazy, for cuddling up with that little person who's recently stolen my heart. So no big projects, no canning, nothing time-consuming. Instead, I offer a simple recipe (more of a guideline) for slow-roasted tomatoes.  It's the perfect way to use up that glut of tomatoes without slaving away at canning or making pasta sauce.  It's a lazy cooks dream, with only a few minutes of hands-on time.  And it's the perfect way to make your house cozy and warm so you can cuddle up with your favorite little person and watch the leaves fall.

Slow-roasted Tomatoes
1)  Halve or quarter tomatoes (depending on size, I used halved cocktail tomatoes) and place cut side up on a baking sheet.


2)  Drizzle with olive oil and sprinkle with sea salt.  Add herbs or spices if desired.  Fresh thyme leaves are nice or follow Molly's suggestion and use ground coriander.  This is also the time to throw in a couple of garlic cloves as well.


3)  Bake at 250 F until the tomatoes are shriveled a bit and the juices are concentrated.  This will take at least 2 hours depending on the size of the tomatoes.  We're not making sundried tomatoes here so don't let them go too long or dry out.


The tomatoes will store well in the fridge in a covered jar.  They'll probably last at least a week that way although I can't seem to test that theory as they always disappear much faster than that around here. And if you're much better at delaying gratification than I am, I bet you could even freeze them so you can enjoy summer in the dead of winter.


Use these little rays of sunshine on pizzas, sandwiches or salads.  Make a pasta salad with slivers of basil, capers and cubes of fresh mozzarella.  And slow-roasted tomatoes make a very grown-up substitute for ketchup on hamburgers, so if summer decides to give us another few days, break out your grill and enjoy the changing of the seasons.